Showing posts with label silhouette america. Show all posts

Saturday, November 9, 2013

Glittery Jingle Bell Pillow


This one turned out amazing! My Mom had the wonderful idea for this beautiful variation of the jingle pillow. Notice the pins in the bottom...that's because the bottom isn't sewn up yet. In order to get this look you need to use glitter heat adhesive vinyl. Were you aware that Cricut wants $14.99 for a 12x19 piece of glitter heat adhesive vinyl? That's insane! It takes one whole 12x19 piece to create this look. You can find glitter heat adhesive vinyl at expressions vinyl for $5.99. 


Using the silhouette cameo, cut out the letters on your vinyl and then follow the directions for adhering it to your fabric. The fabric used here is green burlap with gold sparkles. Remember to mirror your image in studio and also put the paper in with the glitter side down. 


Thursday, November 7, 2013

Comfort and Joy


You can never have enough pillows. Tomorrow I plan on making this one and am allowing you all to see it prior to my starting it so that you may work along with me! It only makes sense to put the word "comfort" on a pillow...and considering the time of year, "Joy" is also necessary. The materials you need:

silhouette cameo
vinyl adhesive (or the fabric ink kit)
Fabric ink 
Fabric (buy 1 yard and that will do it if you want the pillow the same color all around)
transfer tape
sponge

For the font, I am using Magnolia Light from Dafont. Magnolia is really beautiful, but it is difficult to read and might be even more difficult to transfer. The pillow ends up being 14x28 so size your font accordingly. Mine is about 8x20. Follow the tutorial under Jingle Bells for more information on how to create your pillow. I would love to see your finished work! 

Wednesday, November 6, 2013

Jingle Bells

Have I mentioned that I love Christmas? It still feels that at this time of the year - everyone most people are happy and loving...except on Black Friday and then you have to watch your back. Christmas crafts are fun, especially while listening to a little Pandora Christmas. Today, with the help of my wonderful Mother, we created re-created (we saw it in a magazine for like a million dollars) this little beauty:


Here is the how to:


Take your iron and steam the burlap so that it's not all wrinkled up. Then take it over to your cutting mat, or carpet area, and cut the fabric 14x28 - this is the exact measurement of the pillow insert. We had cut some previously so we just used that to guide us. You will need to cut 2 pieces (you can do both the same fabric or add a different fabric). 


Using the Silhouette Cameo, I created and cut the word "Jingle" out on some vinyl (I don't have the fabric kit that silhouette offers or I would have used that...it probably would have been a lot easier too). You don't have to use a silhouette, although they are amazing and I love mine, you can use a stencil you have or make one yourself. Weed out the letters in the word so that negative space is there and then apply your transfer paper. 


This step is CRUCIAL! GET IT STRAIGHT! Otherwise you will have a weird looking pillow. Take your transfer paper and measure, measure, measure. 


This is how it should look when you get the transfer paper off and it is just the adhesive vinyl. You are now ready for the fun part...PAINT! 


Take a sponge and dab paint, little by little. For this project, since I don't have the Silhouette fabric ink kit, I used Speedball screen printing paint from Hobby Lobby. It is really hard to let it dry a little because you are so excited to see what you just created...but just wait - like at least 4 minutes. 


We used little sleigh bells to accent the pillow. You can use as many or as little as you like, but now is the time to add them. Next you need to sew the fabric right sides together making sure to leave quite a bit of space to get your pillow insert in. After adding the pillow insert you will want to do a blind stitch to close the pillow up. You are finished and now have a wonderful Holiday pillow! 


Monday, November 4, 2013

Pillow Box Christmas Advent

The Silhouette Blog gives you weekly challenges, and I find them really fun and exciting to see what I - and others - can come up with. Using the pillow box shape from the silhouette online store I created this wonderful little masterpiece. This is the only one I have done so far.


On the tag that you pull out you can write quotes on it, Bible verses, put candy inside, or put little trinkets in to pull out. You can also use ribbon in place of the twine so that it just sticks straight up from the box. Now all you need to do is create days 1-24 and something to tack your boxes on! Good luck! 

Tuesday, October 29, 2013

Houser Home

I don't know about you, but laundry and dishes pile up at our house quickly. We have the 2 girls 100 percent of the time and share 50/50 time with the 3 boys, so our home pretty much stays a disaster area. With that being said,  I've been thinking about how I can provide a responsibility/chore list that is also a cute display - I think I have found it.


You can use chalkboard paint on anything you would like to get this look. I didn't use it here, but this is chalkboard so it makes it super easy to change who does what on a weekly basis, then I just added it to a cookbook holder that I had. I put the picture above that just says "Houser Home" so that you can see how it would look if you just wanted blank space to put whatever you want for the day or week (quotes, dinner, etc.) As always, I used my silhouette cameo to cut out the shapes and letters. 

Monday, October 28, 2013

Pumpkin Cupcake Box

I tweaked one of the cupcake boxes a little bit to make a gift for the teachers at school. I liked how it turned out, but in the end...probably should have just gone with straight orange for color since it is borderline looking devilish. Anyways, here it is!


The idea is to add either candy, cookies, or a pumpkin bread muffin inside. These are great inexpensive ways to show your children's teachers that you are thankful for taking care of them. Here's the how-to:


All the pieces were cut using the silhouette cameo. 


I then used glue dots to glue down the pieces together. I used a sandwich bag that I cut for the front opening, but you could use anything you want (even the plastic wrap from sliced cheese I suppose). 


Fold it all up and insert the cupcake holder - or leave it out depending on what you are putting in there. 


Here's the back of the box. If you like the idea of having the inside be a surprise, then leave the face off and just use it as a cute little box! 


Saturday, October 26, 2013

The Paper Pumpkin

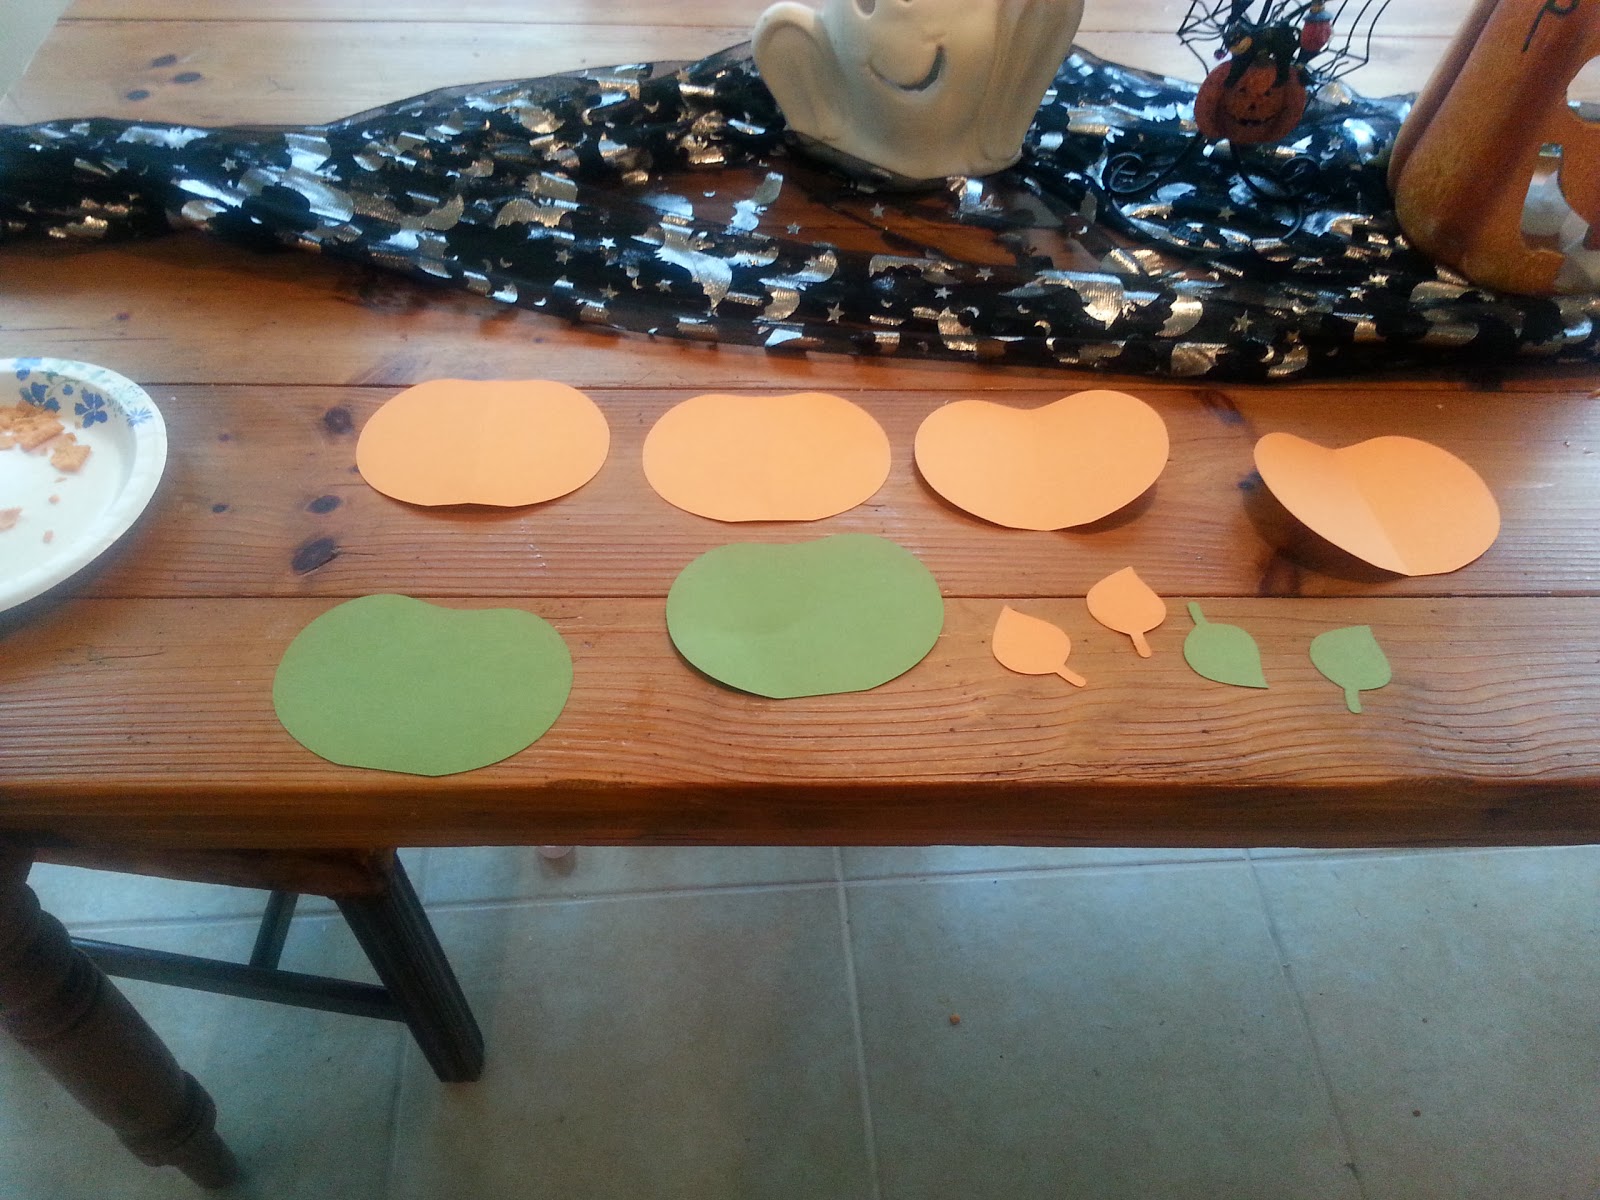
Today I wanted to attempt something a little more fun...and use a lot of glitter doing it. I came upon a wonderful post by Jenice from Lolly Paper and she did such a spectacular job creating her paper pumpkin that I had to have one for myself. Well...mine didn't turn out near as amazing as hers, but it still is pretty - as long as you're not looking at the picture asking yourself...what is that.


I'm not real big on the leaf...I think it looks odd. I added a combination here...you can add burlap for the stem, or use something else. Here is the how to:


 Take your silhouette, or find a shape of the size pumpkin you want and trace it and cut out 6 pumpkins. The cheez-its in the picture have nothing to do with the tutorial. 


Glue them together at the sides. At this point it doesn't matter the color paper you use unless you plan on keeping it that color. 


Glue your pattern pieces to the pumpkin - I used spray glue because it's amazing, but it is very VERY sticky. 

Create a guard to spray adhesive on your pumpkin - again this stuff is STICKY (I have scrubbed my hands and still have glitter glued on them - I assume it will never come off - yeah...this stuff is that good). Next pour your glitter where you sprayed and finish all sides of the pumpkin. Do whatever your heart desires to make your little paper pumpkin extra amazing. You can find this pattern in the silhouette online store here. Have fun! 

Friday, October 25, 2013

"Witch" One?

When I was growing up I don't really recall having a say in what I was for Halloween....or maybe I didn't care due to my infatuation with candy - it didn't really matter as long as I got my bag filled. My oldest daughter, she's almost 3, gave me a run for my money. She was all about Doc McStuffins and couldn't wait to get her costume...and then it got here...she wanted to be Princess Sofia. Yep. Nothing else would do except Princess Sofia - so since I am mother of the year to quiet the madness...we went with Princess Sofia. If you read my post last night, then you were able to see my youngest, 15 month old, wearing her witch outfit.

 Today Miranda had to be a witch too. Hello number 3 costume. She put it on and loved it for about 4 minutes and then wanted to be Sofia again. Goodness gracious. Long story short...she will be a witch for Halloween. Tonight they went to a 'trunk or treat' and sported their cute little outfits.
 

When I bought Maggie's witch hat...I did not realize that I was going to need another...and of course they did not have anymore left. So, the only thing left to do was to break out the silhouette machine and get to work. Although, you don't have to use a silhouette machine - it just makes life easier. First thing first, I found a 3-D witch hat pattern (which is really used for candy holding) on the online store and printed it out on card stock. I don't have the fabric cutter so that wasn't an option for me - but I will get it one day. 
Top pieces are the card stock and bottom are the fabric pieces. I just traced the pattern onto my fabric and used my scissors. 

Next I pinned it right sides together and sewed it up. After that I turned it right side out and took some odd looking tool that obviously belongs to  my husband, although I have never seen him use it - or many tools at all for that matter, and poked it up the top to get the pointed look. Then I proceeded to fill it with stuffing.


Pin the round circle piece to the bottom of the hat, right sides together and then hand sew. When finished sewing, tack down a piece of felt or any thicker material to cover up the hole in the middle. Add a headband or whatever other tool you need to hold this to your child's head. 


And BOOM...there it is. I somehow misplaced the green strip of fabric that I was going to use around the hat, but I have every intention of gluing some orange ribbon around it. So there is an example, although it is not complete yet. 


Here is my Lovey. I used alligator clips to hold the hat to her head - I just slid them underneath the thick felt piece. 

Tuesday, October 22, 2013

Decorating Pumpkins with Vinyl

I love to carve pumpkins, but when you do it too early then all you have on Halloween night is a rotted corpse of a pumpkin and nobody ringing your doorbell for candy. So, with that being said...I decided that I would fix up one of my pumpkins with a little vinyl.

After I put the vinyl "H" on, I decided I wanted to spruce it up with spiders and a cobweb...well I had to go with white glitter because there was no black in the double sided adhesive kit I got from the Silhouette store. For the spider and the cobweb I used the double adhesive paper - so that allowed me to add glitter to the top. I think that this project turned out alright...it's not my favorite, but it is definitely something to set out on the porch. Oh...and my dog chewed the stem of my pumpkin for me...how nice. 
Prior to the glitter and dog chewing. 


My girls at the patch.