Wednesday, November 20, 2013

Letter to Santa Pillow

You know that I'm big on Christmas...everything Christmas. My house is actually in the North Pole and people call me Claus. ;) What's a better way to communicate with Santa then a direct pillow talk route? My kiddos love to write letters to Santa, well...not the ones that can't write...or speak yet for that matter, so a fun way to do this is to have them write their letter and put it in Santa's pouch. They can even write a letter on Christmas Eve for Santa and he can leave his response back in the pouch for the kiddos! Pretty much you can put whatever you want in the pouch, or nothing at all. You can give this as a gift and put some Christmas goodies in it like cookies, candy canes, gift cards, subpoenas etc.


**If you are feeling extra crafty, which evidently I am because my friend told me I am, you can put your children's names under the belt so that they can have their personalized letter to Santa pillow. 
The Tutorial:


I used red fleece from Hobby Lobby and cut 3 pieces 12x12. I used a tape measure.


I used the fake fur, also from Hobby Lobby and placed a 2 inch wide strip down the middle (I sewed on both sides leave) and then sewed 2 black buttons on. 


Take your 3rd piece of fabric and fold directly down the middle and iron it. I used my silhouette cameo to cut out the pieces for the belt, but you can use whatever you would like. Then I used my iron and put them on the fabric. 


Match up the bottom belt piece to the front of the Santa suit. 


Place your extra piece of fleece and put down on top of the layers creating a sandwich. 


Pin your pieces together. I pin my stuff like this...I'm not sure how other people pin their projects together - but I like to do it this way. Make sure to mark where you will leave your opening to stuff the pillow. I left my opening by the "arm" of Santa. 


Pull your fabric out the little arm hole and make sure to poke all points with a tool...such as your scissors. Your next job is to either use your pillow form or some cluster puff...both of which you can buy at Hobby Lobby. 


** Disclaimer...I have no idea how good you sew - so if you have small children who like to eat things, make sure you get those suckers on tight or use the heat adhesive vinyl to do fake buttons. **


Monday, November 18, 2013

Waiting...

I'm still waiting for my sketch pens to get here....so while I'm waiting I thought I would make my favorite - another pillow. I used some scrap glitter heat adhesive vinyl that I had and the "Merry Christmas" download from Silhouette and created this beauty.


Once again, pillows are the easiest things to make...even for a beginner. They make wonderful gifts and take very little time. This is a 12x12. I just measured and cut my fabric - no pattern. 


Here is an overhead shot so that you can see the pattern on the back of the pillow. I went with the red with white polka dots. It's super cute. 

* The glitter vinyl is from expressions vinyl 


Saturday, November 16, 2013

Pajama fight??

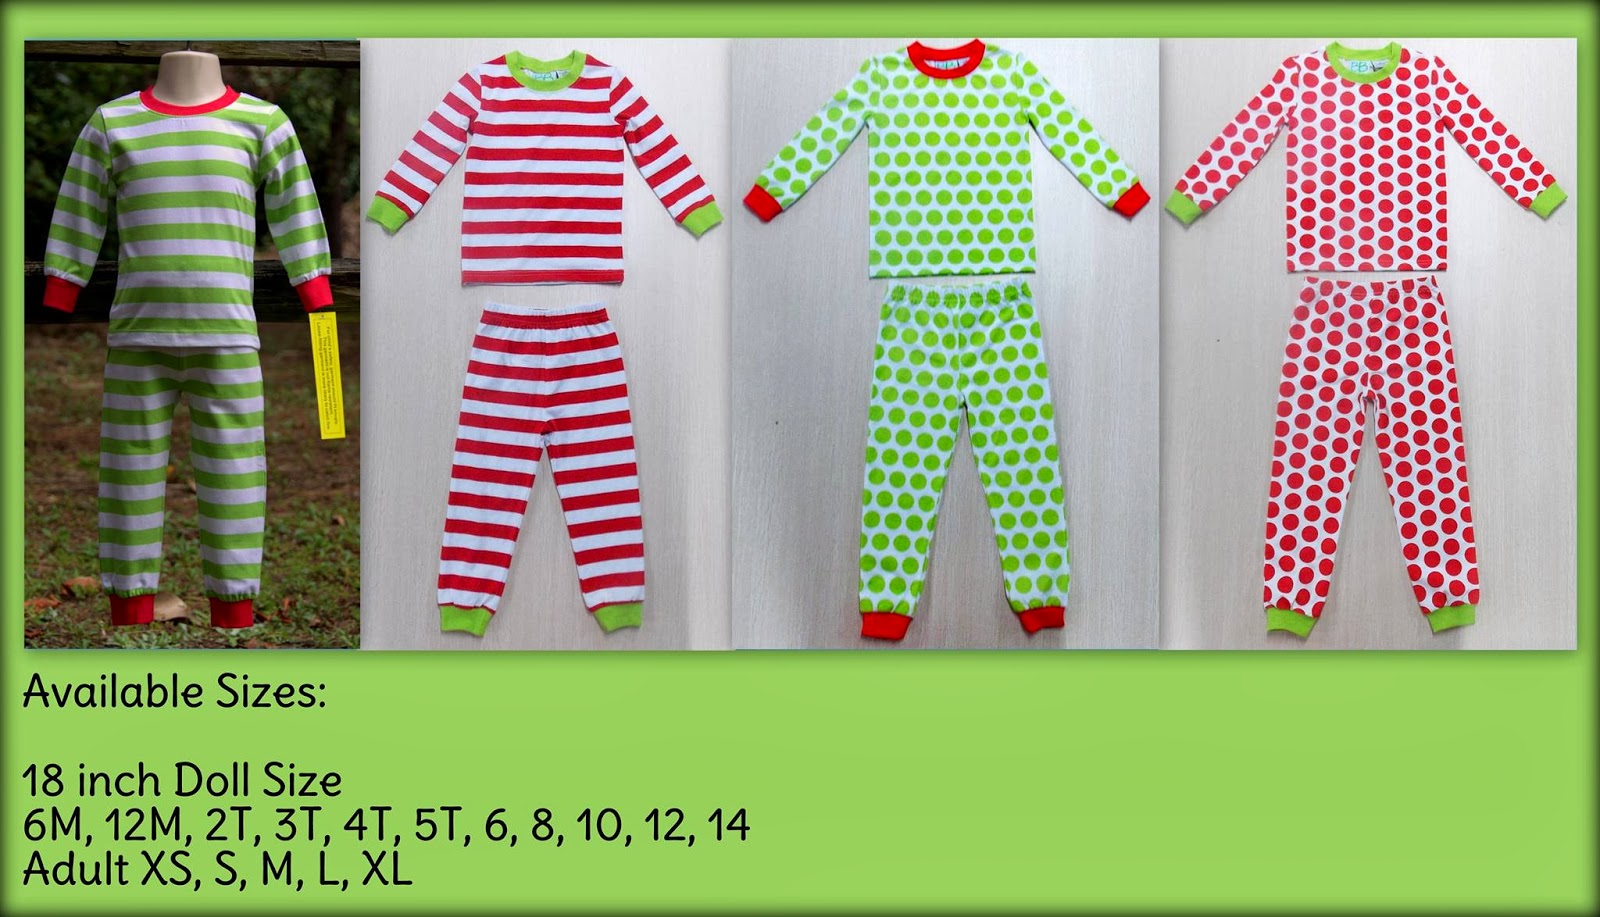
This morning I got online to order Christmas pajamas that were being posted at 9am. OH MY GOSH! It literally gave me anxiety. These things were selling like hot cakes and my computer kept freezing up or wouldn't put the pajamas in my cart. Who would have thought that you would have to fight to get pajamas??


I was able to finally get 2 red striped ones, 1 green stripe, and 1 red polka dot. They are now completely sold out. It didn't take long either...I could see as I was completing my order it said "only 5 left in stock"...it was actually counting down WHILE they were in my cart. Phew...that was close. ;)

**I'm going to use some wonderful heat adhesive vinyl on a couple of these and embroider on the others. My delivery date is set for November 30th, so it will be a while before I'm able to post these. 

On another note...notice I haven't updated recently. That's because I have projects in the works that are in need of my sketch pens that I ordered. I will post as soon as I'm finished. 

Tuesday, November 12, 2013

Another Birthday (but this time with print and cut)


Again, the Silhouette Cameo has been my best investment. With the print and cut feature, I no longer have the need to go to office max and have my invites printed and cut, or cut them myself. This is a picture I took of the invitation. Using the offset feature I was able to take the Doc and put a little white halo around her, as well as take her out of the picture she was in by using the trace feature. If you have any questions on how to accomplish this, let me know and I'll explain further. 

Sketch Pen Special!

If you haven't had a chance to get the Silhouette Sketch Pens yet...grab them up today at HSN! They are $14.95 and you get FREE shipping if you use this code HOLIDAYSHIP13. This is for a set of 24 sketch pens and a coupon for 10 free sketch designs. Can't beat this deal!


Sunday, November 10, 2013

Comfort and Joy Update

I'm not quite finished with my pillow yet because I haven't gone to get a pillow insert....I will do that tomorrow...maybe. =) Here is what I have so far. It looks good, the words are a little thin and in some areas the paint didn't get on the burlap very good - but that makes for a cute homemade pillow. These suckers are excellent gifts! If you have a sewing machine and can sew in a semi straight line...you can do it. These don't take long at all, so everyone has time to do it. Plus, you don't need a pattern. Just figure out the size of the pillow insert you are going to use, or use regular filling, and take a ruler and measure out your fabric and then cut it out. If you missed my tutorial on how to paint onto a pillow, you can find that here.


Moss Tree

Moss trees are pretty...that's it. They look good because they look like miniature real trees - and so I love them. These trees can be used at any time of the year, so it makes them even that more wonderful. They are also inexpensive and super easy to make. When trying to gather ideas for my projects I tend to look around in catalogs or online and it is so funny to me to see things for $50+ that you can make yourself. An example would be of the styrofoam multi-colored ball tree from pottery barn. It is really a cute idea, but I'm not paying that much for a bunch of styrofoam balls glued onto a styrofoam tree cone. 


Get a bag of sheet moss from Hobby Lobby, or whichever craft store you prefer and glue the sheets on with spray adhesive. After that's done, you are either finished with your project or you can add little paper flowers like I did here. I used my silhouette cameo, surprise surprise, to cut out the paper flowers and then I doctored them a little by adding glitter. I'm not quite finished with it yet, but you can add as many or as little as you like. Next you can take a short branch and push it in to the base of the tree and set it up in a pot, or you can just leave it how it is!